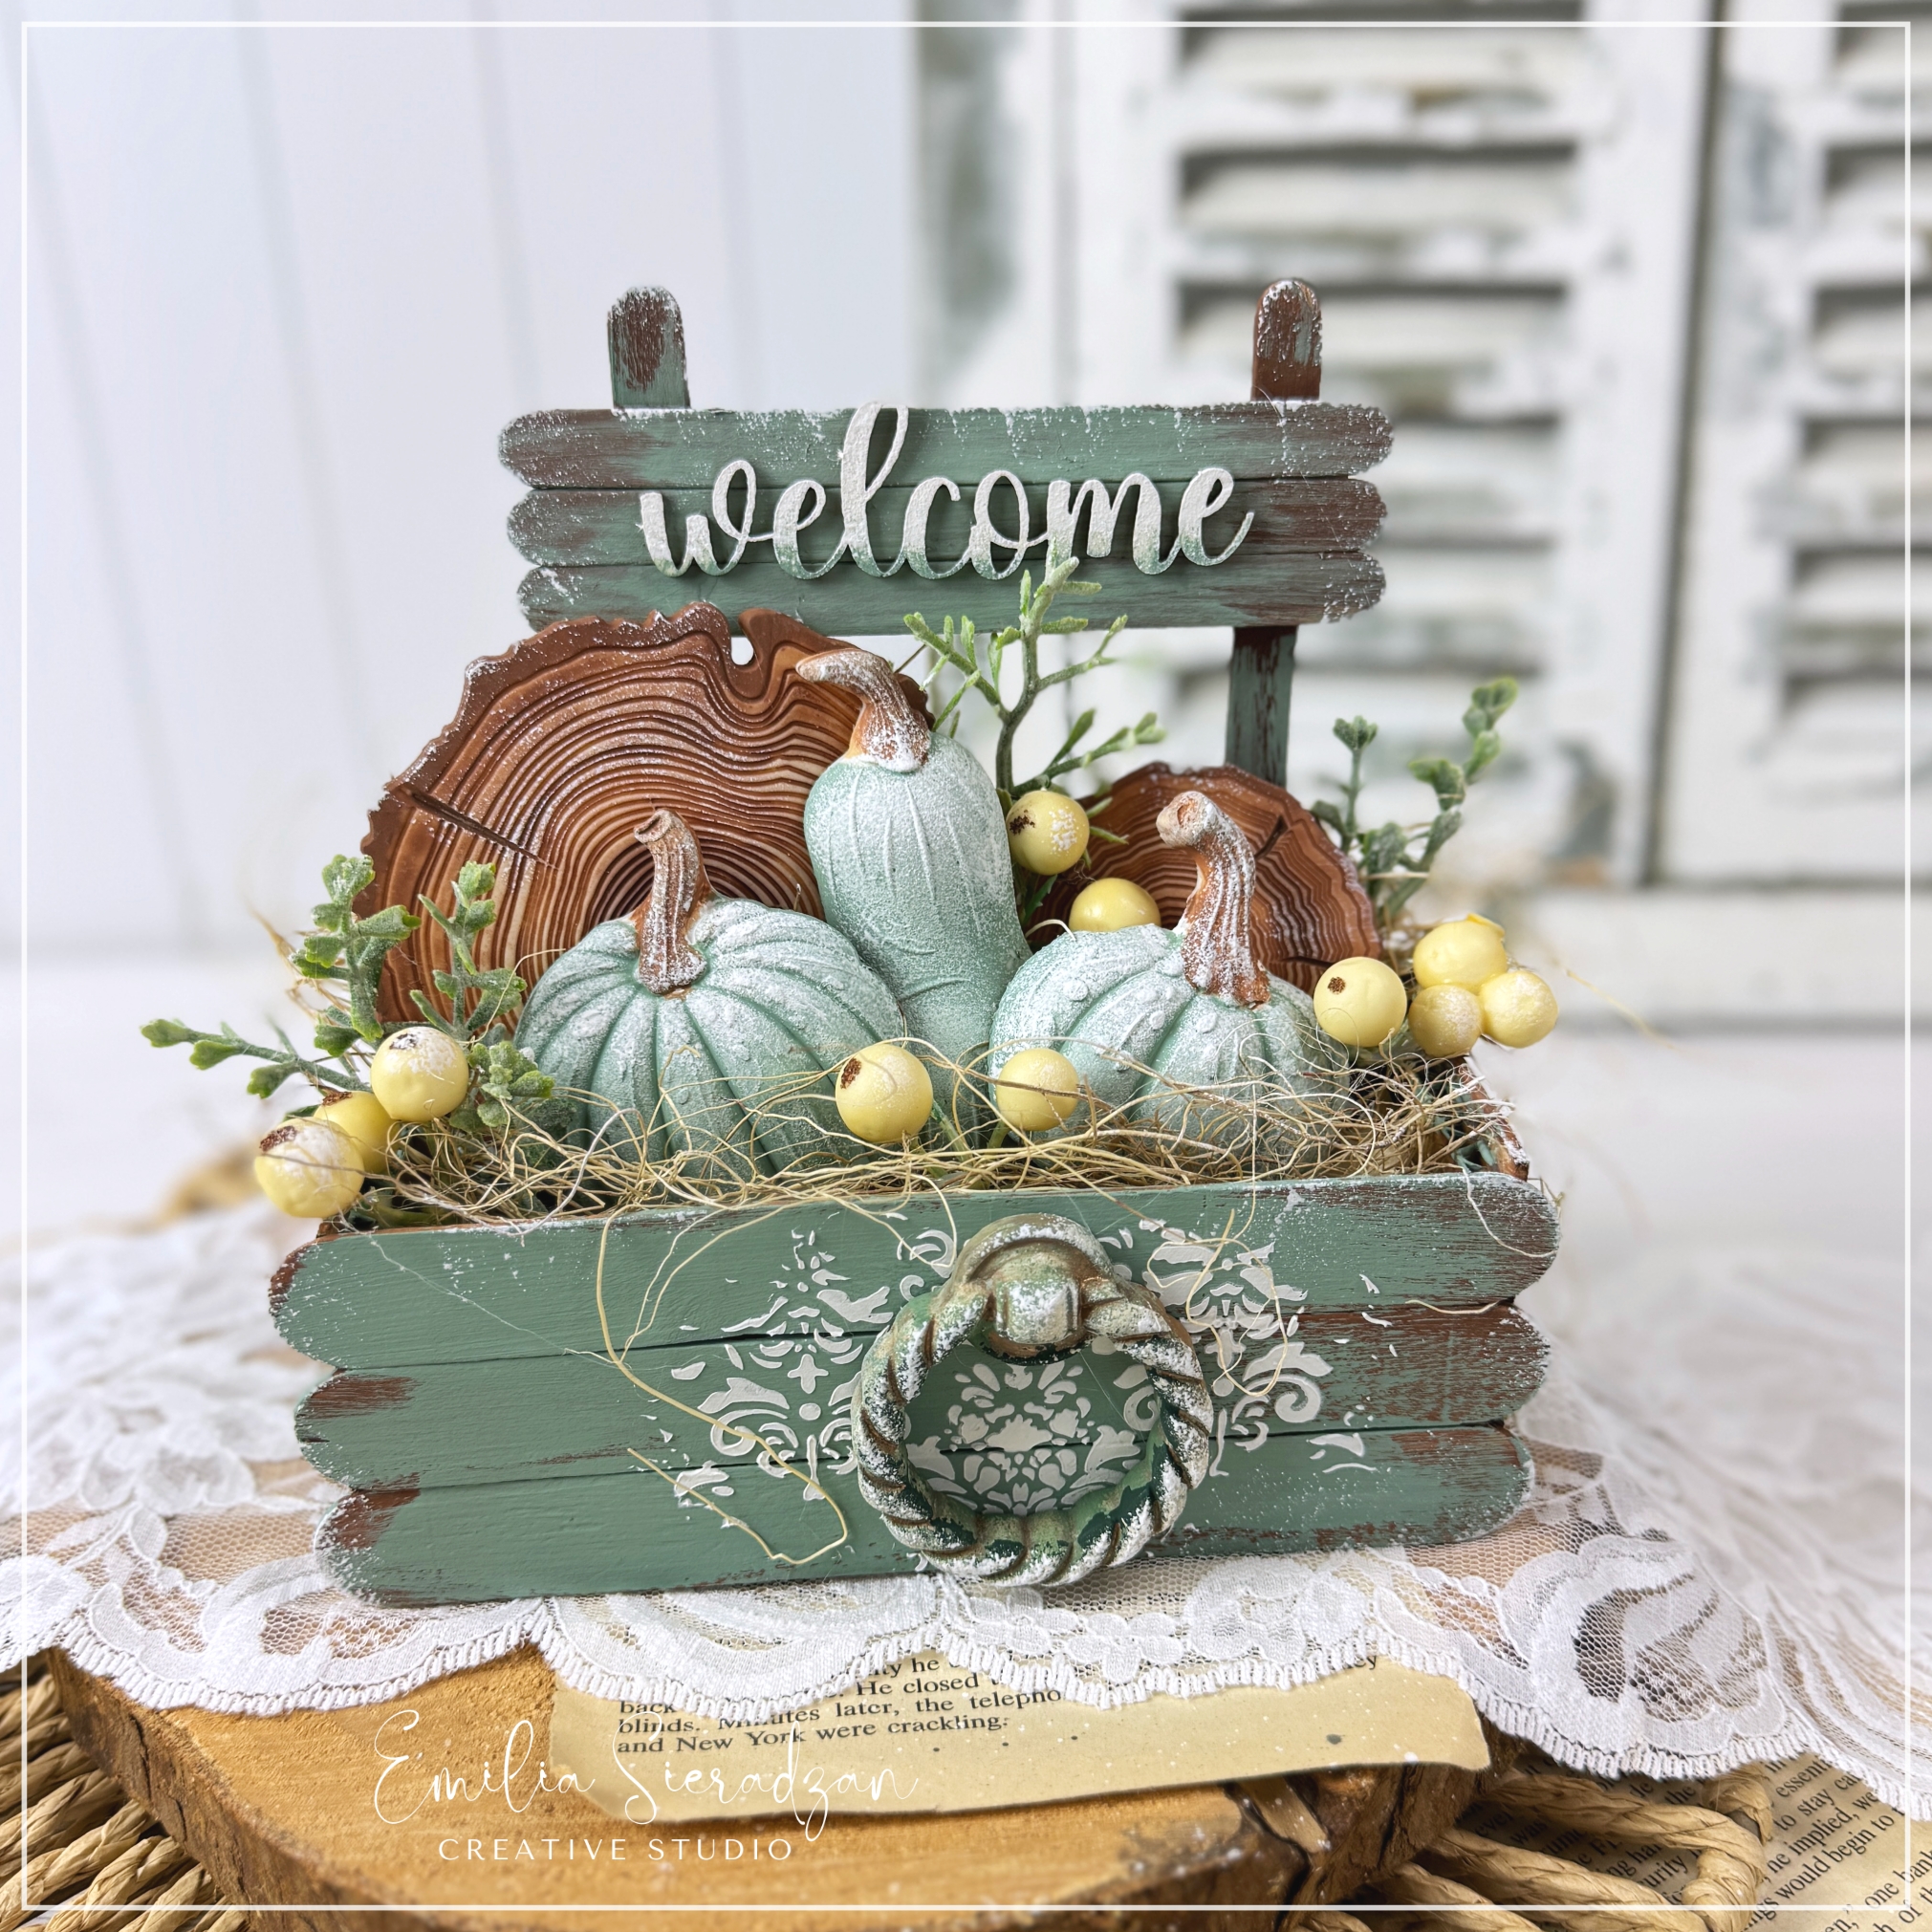
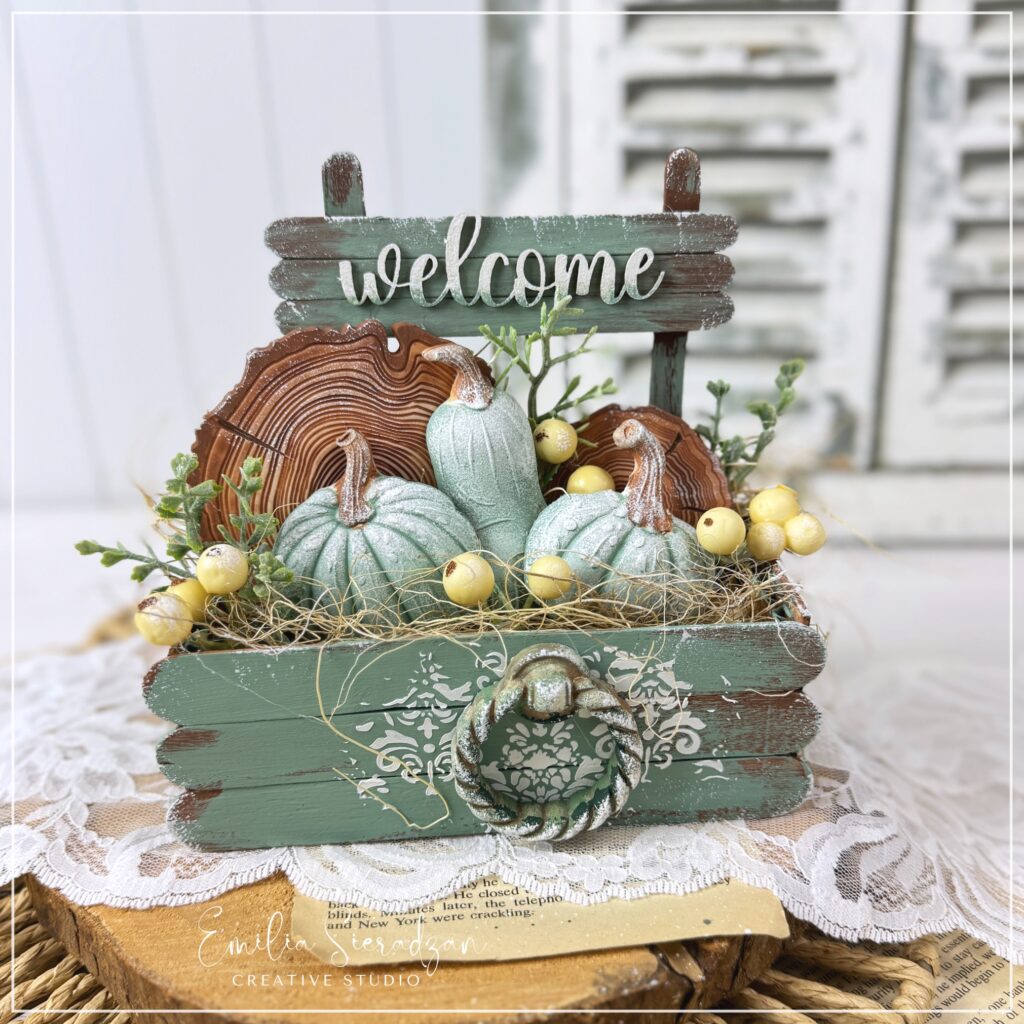
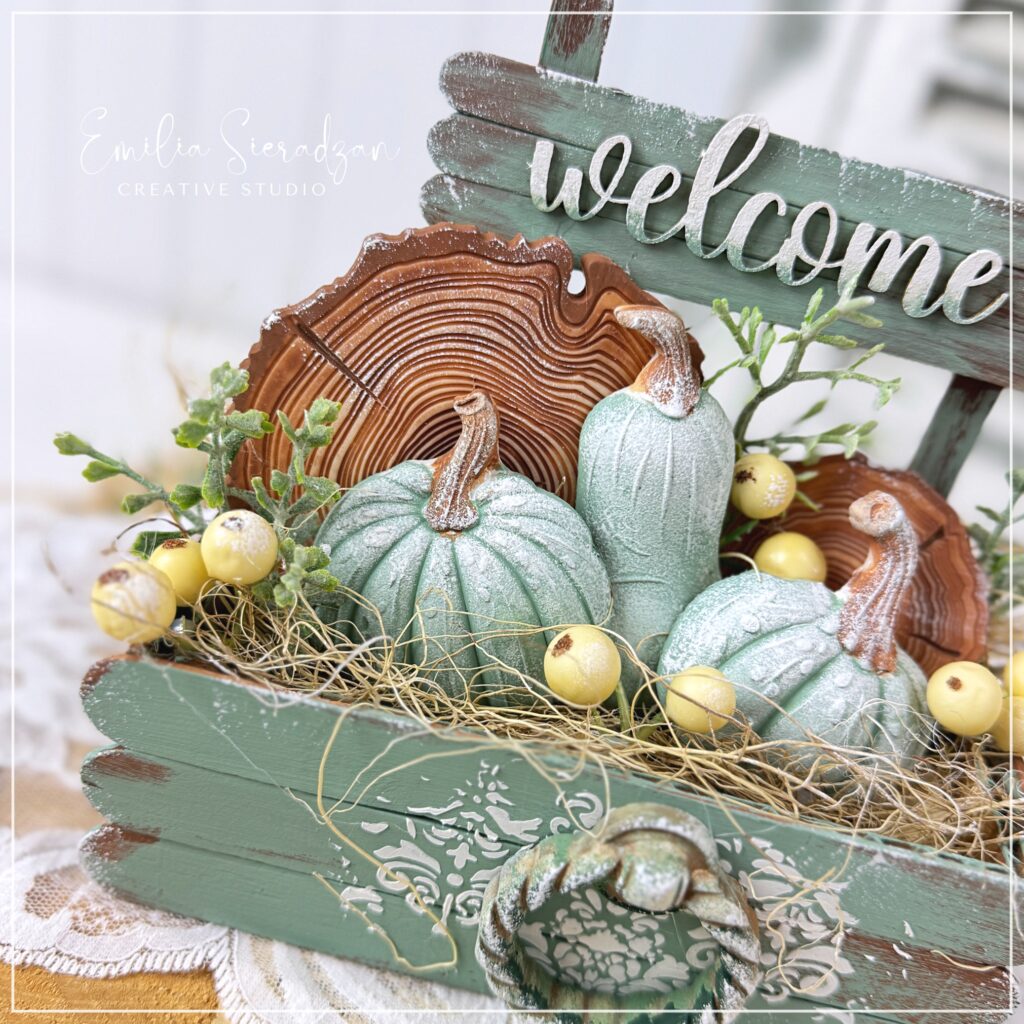
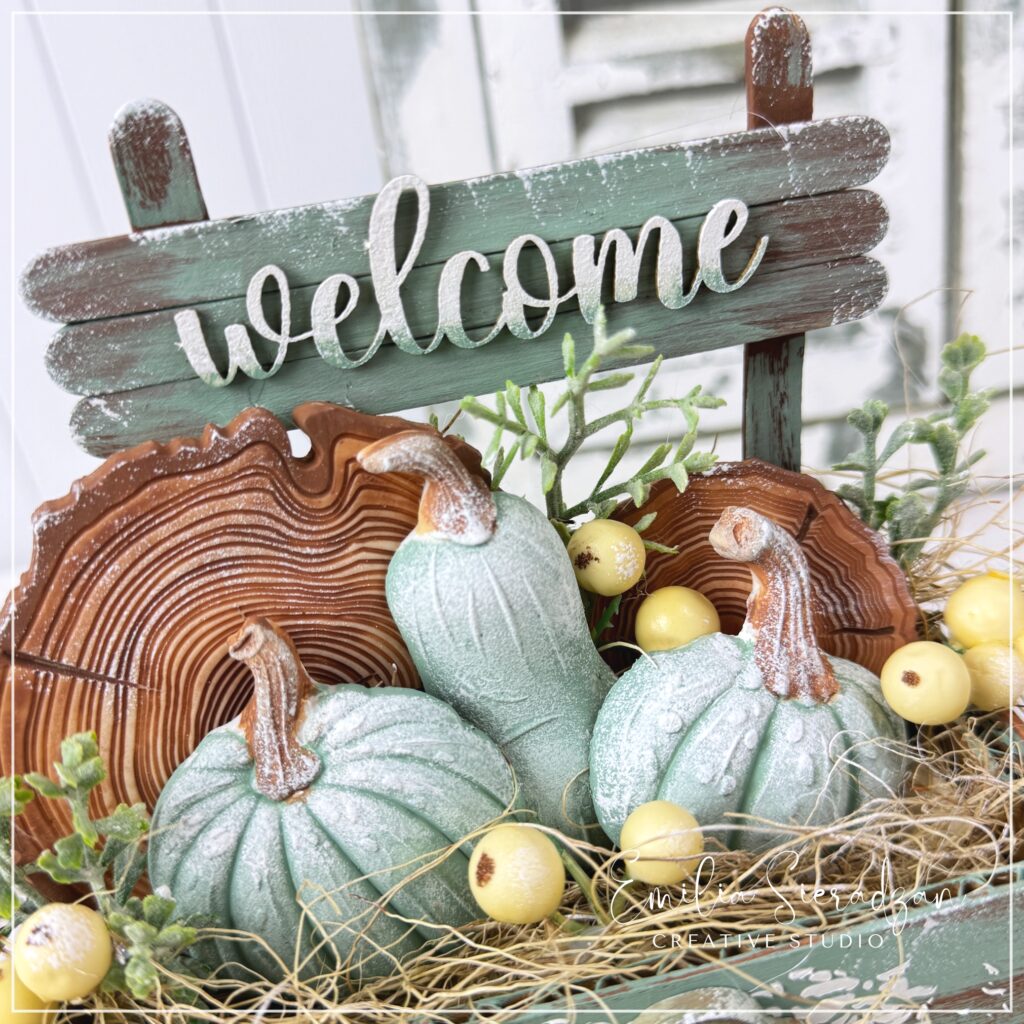
DIY Pumpkin Stand using Lollipop Sticks
Hello, crafty friends! 🍂 Today, I’m excited to share my latest autumn-inspired DIY project—a charming pumpkin stand! Using lollipop/craft sticks, moulds from Stamperia’s Golden Harmony collection, and a few creative touches, I transformed simple materials into a cosy fall decoration. I also filmed a short video of the entire process, so you can follow along step-by-step. Let’s dive into the details!
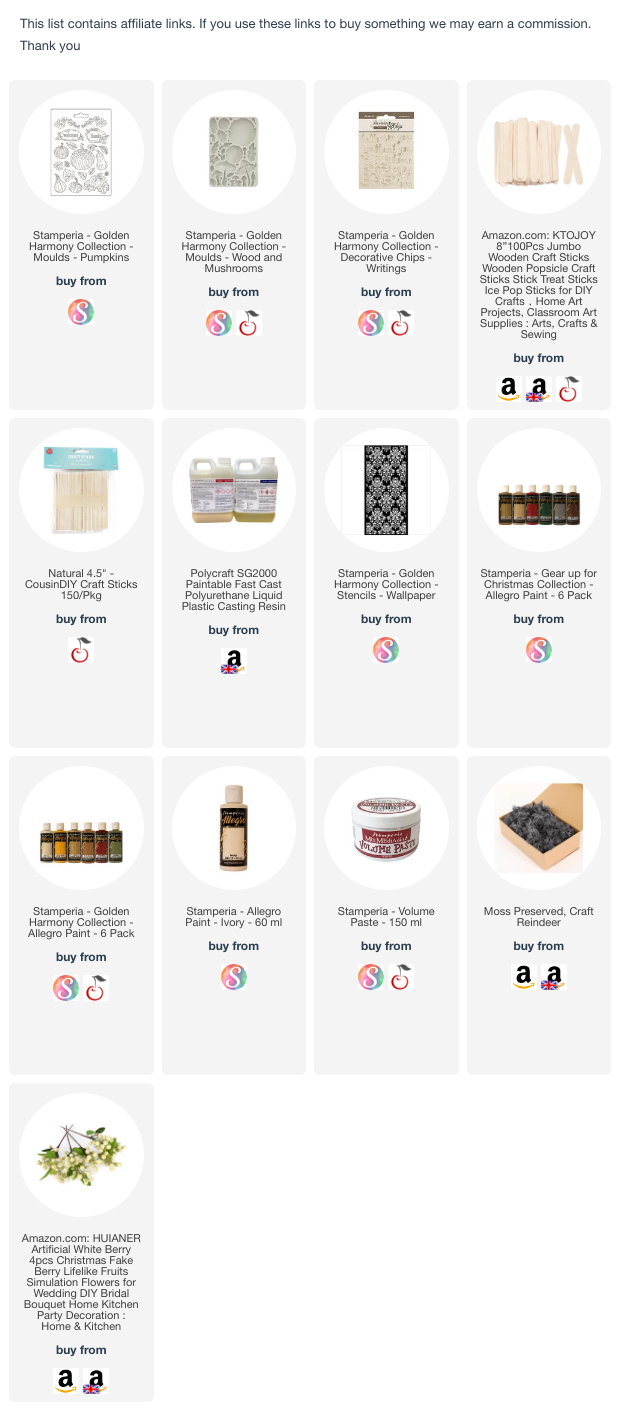
Supplies Needed
Here’s what I used to create this pumpkin stand:
- Lollipop/craft sticks (for the base and sign)
- Stamperia Golden Harmony Pumpkin Mould & Staperia Golden Harmony Wood & Mushroom Mould (for pumpkin and wood slice shapes)
- Resin or air dry clay (to create the pumpkin and wood slice forms)
- Acrylic paints (various shades)
- Artificial leaves and berries (for decoration)
- Hot glue gun and craft glue (for assembly)
Step-by-Step Instructions
Step 1: Creating the Pumpkin and Wood Slice Pieces
Using Stamperia’s Golden Harmony moulds, I poured resin into the pumpkin and wood slice shapes. Resin is great for creating sturdy, detailed shapes, and it hardens quickly, making it perfect for this project. Once the resin was fully cured, I removed the pieces from the moulds.
Tip: If you’re new to resin, make sure to follow the instructions on your resin packaging, and work in a well-ventilated area!
Step 2: Painting the Resin Pieces
Once I had my pumpkin and wood slice shapes, it was time to bring them to life with paint! I used acrylic paints from Stamperia. The pumpkins got a soft, sage green colour with hints of warm brown on the stems, while the wood slices were painted to resemble natural wood grain.
Pro tip: Dry brushing with lighter shades adds texture and dimension to the pumpkins and wood slices!
Step 3: Building the Base with Lollipop Sticks
To create the base, I glued pieces of cardboard and then lollipop sticks, forming a small box to hold the pumpkins and wood slices. I also used a few lollipop sticks vertically to form a little signboard where I added a “welcome”. I painted it with brown and green acrylic paint and distressed the edges with white paint.
Step 4: Adding Decorative Elements
To complete the arrangement, I added artificial leaves, berries, and a bit of dried moss around the pumpkins. These details bring a touch of nature and make the stand feel lush and inviting.
Final Thoughts
I had so much fun creating this pumpkin stand, and I hope it inspires you to make your own! Working with molds, resin, and simple materials like lollipop sticks shows that you don’t need fancy tools to create something beautiful. Plus, Stamperia’s Golden Harmony molds offer so many options to get creative with fall-themed crafts.
Happy crafting, and let me know if you try this project! 🍁