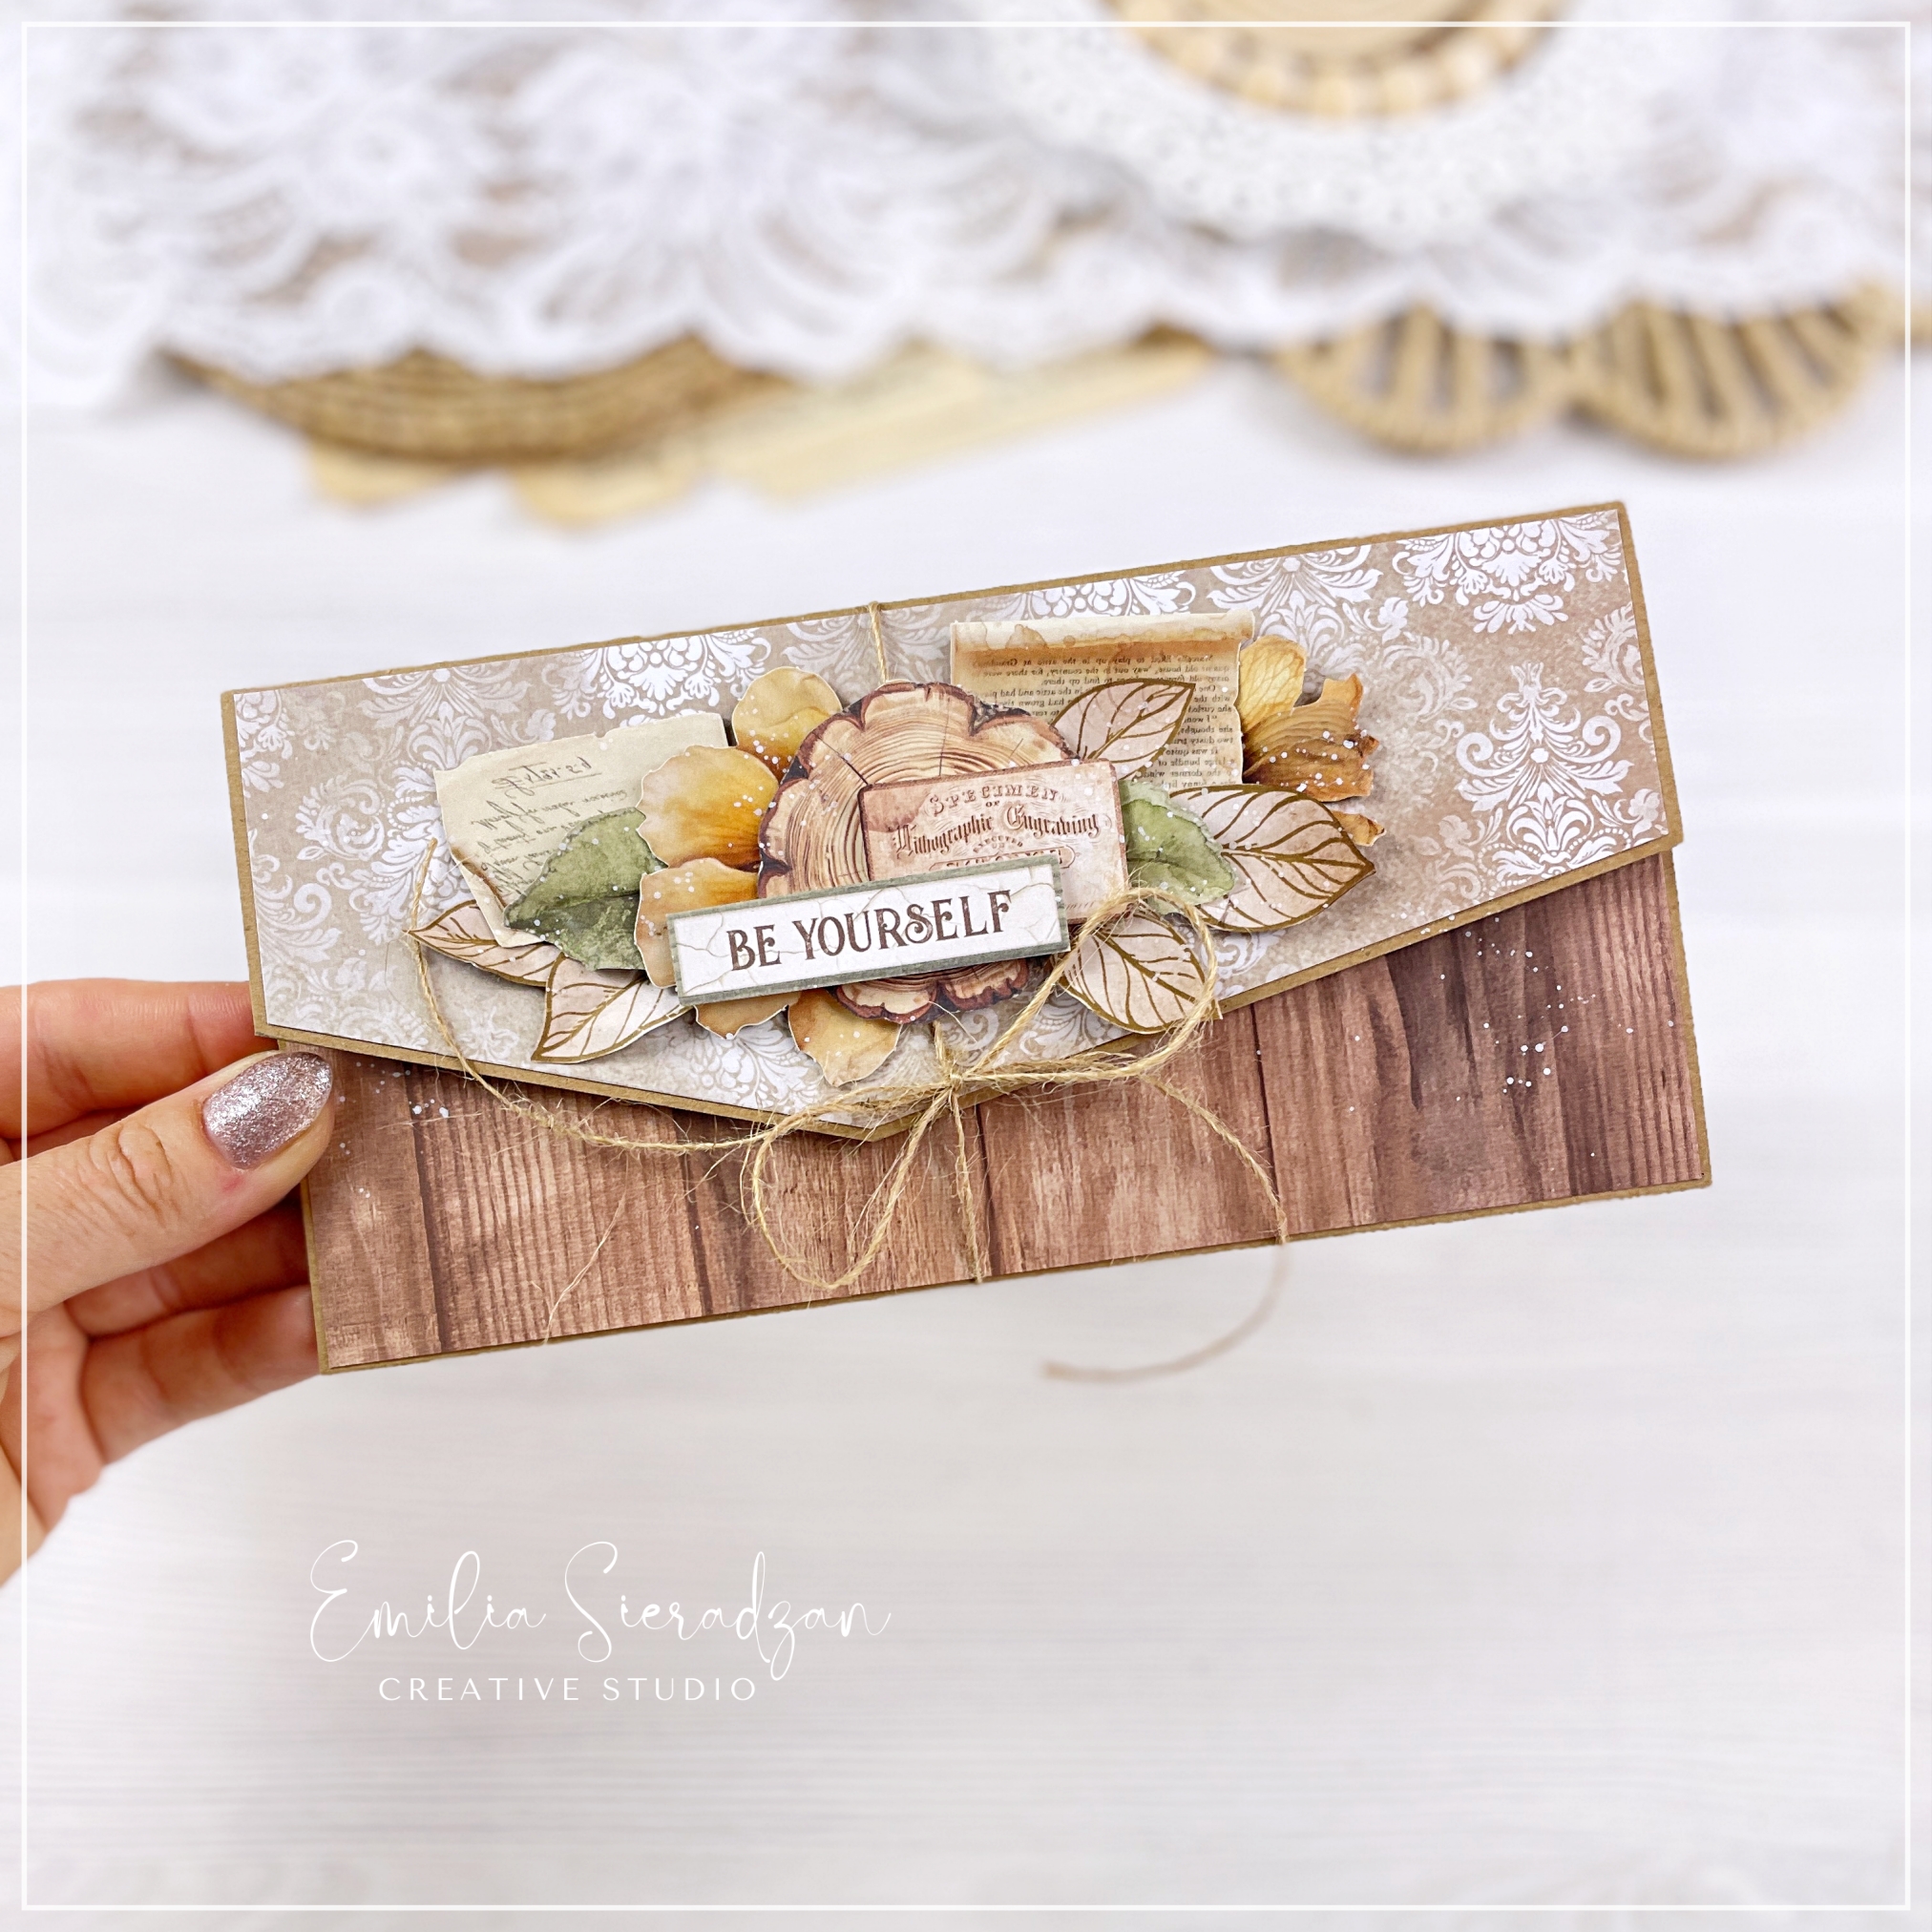
How to Make an Envelope-Style Card with Stamperia’s Golden Harmony Collection
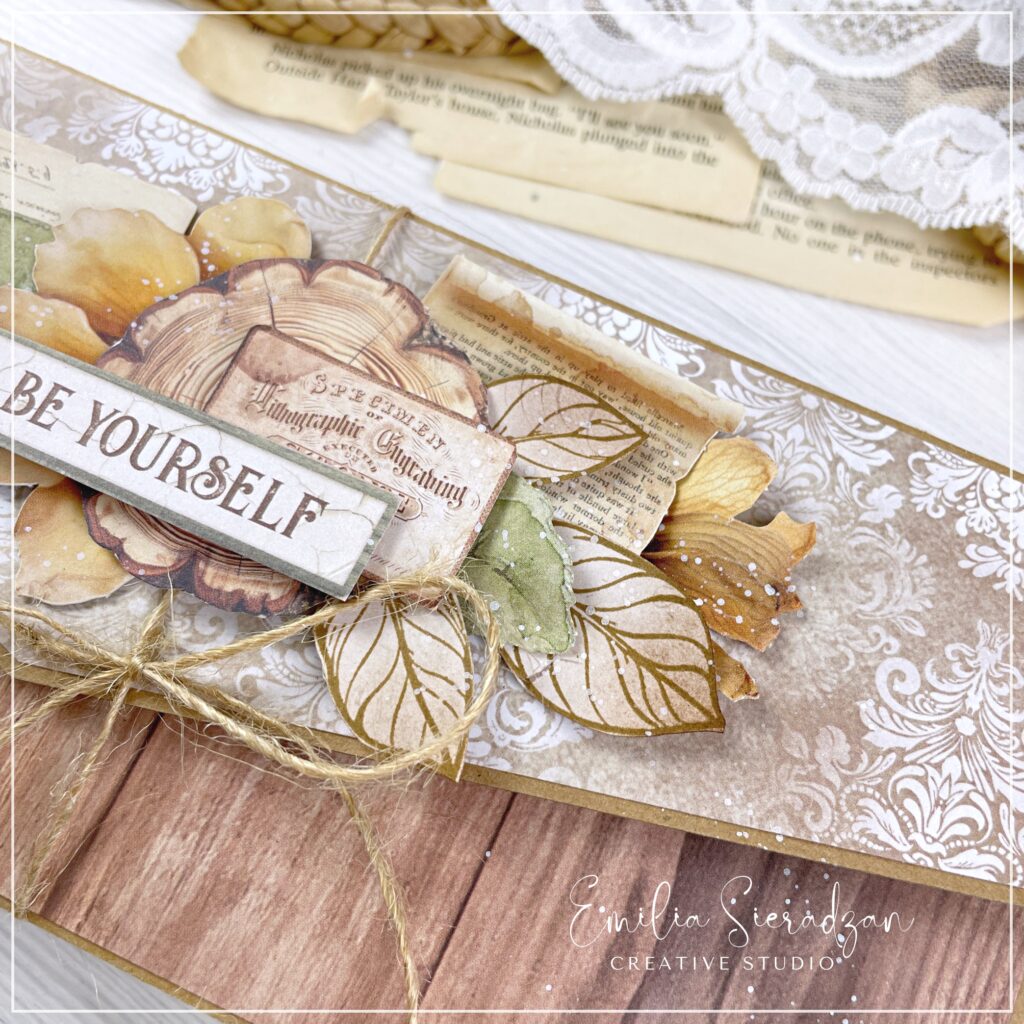
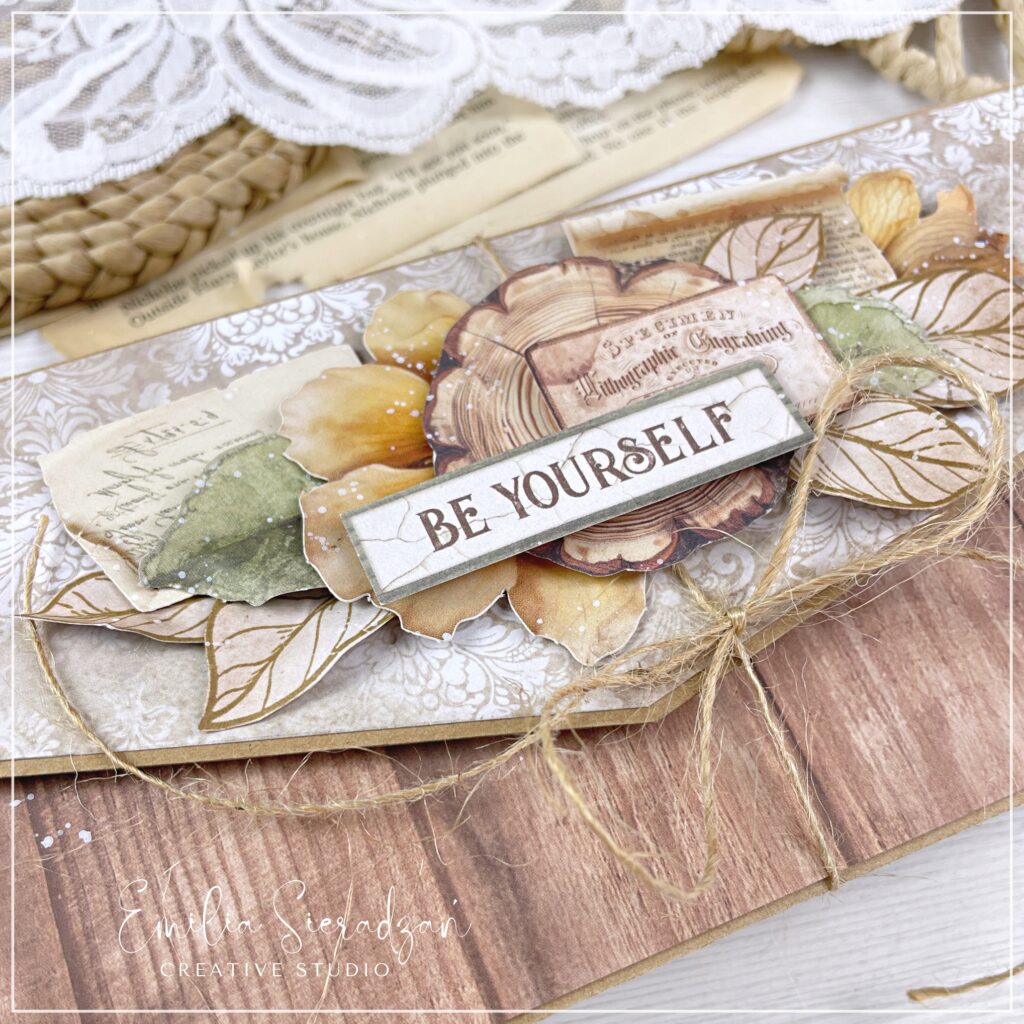
If you’re looking for a unique card idea that mimics the look of an envelope but is a folded piece of A4 paper, this post is for you! This envelope-style card is simple, yet beautiful, and can be used for any occasion. I’ve made a short step-by-step video showing how to decorate the card using the Stamperia Golden Harmony collection. The sentiment on the card reads “Be Yourself”, making it a lovely message for birthdays, thank-you cards, or just because.
In this post, I’ll walk you through how to make this charming card and offer decoration tips.
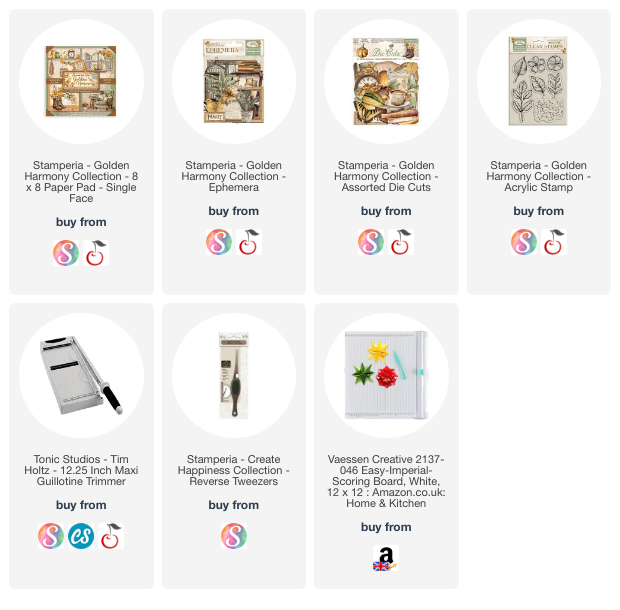
Materials You’ll Need:
- A4 paper – Any sturdy paper or cardstock in your favourite colour.
- Stamperia Golden Harmony Collection – Includes paper designs, die-cuts, and embellishments for decoration.
- Scissors or paper trimmer.
- Glue or double-sided tape.
- Twine or ribbon (optional)
- Sentiment stamp or sticker – In this case, I used a fussy cut element from the collection – “Be Yourself”.
- Ink pad for edging (optional)

Step-by-Step Process:
Step 1: Fold the A4 Paper
- Start with a standard A4 sheet of paper.
- Fold it into three equal sections horizontally. This will create the basic shape of your card.
- Once folded, it will look like a long envelope.
Step 2: Trim the Top Flap
- To give the card that authentic envelope feel, trim the top third into a flap shape. I used straight cuts and resulted in no-symmetrical triangle shape.
- You can create a rounded edge or a pointed one, depending on your style.
Step 3: Choose Your Papers and Embellishments
- I used Stamperia’s Golden Harmony collection, which features elegant and vintage designs.
- Pick a coordinating paper from the collection for the background and glue it onto the card’s outer flap and inside sections.
- You can layer different patterns and textures to add dimension and interest to your card.
Step 4: Add the Sentiment and Decorations
- I used a tag from the collection that says “Be Yourself” for the sentiment. You can use any sentiment that suits the occasion.
- To start I used a simple piece of twine, tied around the card to secure it and give it a rustic, handmade feel.
- To create a focal point, I added a cluster of stamped leaves, little tags, die cuts and images fussy cut from the collection underneath the sentiment tag.
- Don’t be afraid to add depth with foam tape under some elements, making them pop out from the surface.
Step 5: Final Touches
- You can also lightly ink the edges of the card and papers with a brown or gold ink pad for a distressed, vintage look.
- Lastly, I added some delicate splashes of white paint, but you can omit the step.
Why You’ll Love This Envelope-Style Card:
- Versatile for Any Occasion: While my card features the “Be Yourself” sentiment, you can easily change the message to suit a birthday, wedding, or thank-you card.
- No Special Tools Needed: All you need is paper, scissors, and glue to create this design.
- Customizable: You can use any paper collection or color palette you love.
I hope this tutorial inspires you to create your own envelope-style card. With its charming design and personal touch, it’s a heartfelt way to send a message to someone special.
Happy crafting!
The product list includes affiliate links – which means I’ll get a small commission if you order anything at no extra cost to you – read more about it HERE
Check Stamperia Golden Harmony in Craftelier – Europe, they ship worlwide!
For UK based crafters – Golden Harmony in That’s Crafty.